NOTE: These are basic instructions for how to install a bolted access stair. Actual assembly will vary based on stair type and options; each stair ships with printed instructions that are specific to the order.
Prior to assembly
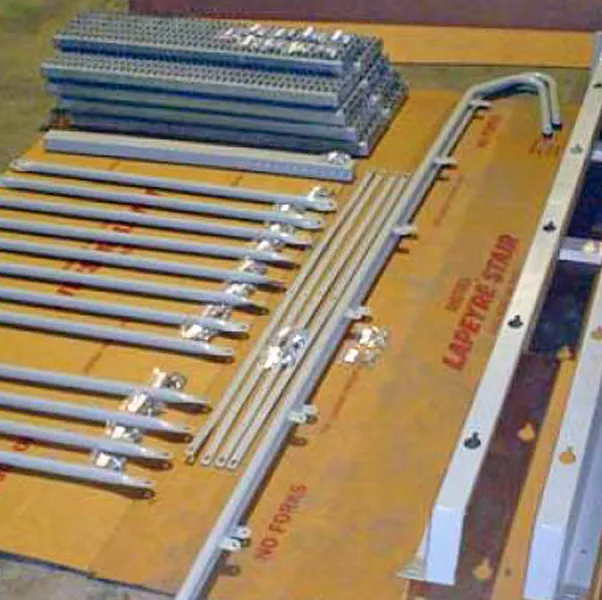
Use the shop drawing that is included with your shipment to verify that all of the stair components are in place and inspect for potential shipping damage.
If either stringer is pierced, creased, or permanently deformed, contact us for replacement parts; do not assemble the stair until the replacement parts arrive. Slight bowing of the stringer is acceptable and will be corrected when the stair is assembled.
If the stair rails or balusters are bent or damaged but still functional, contact us for replacement parts. You can still use these parts to assemble the stair and swap them out when your replacement parts arrive.
If possible, keep the cardboard packing material and use it to stage the stair components for assembly. This will protect the parts from potential surface damage.
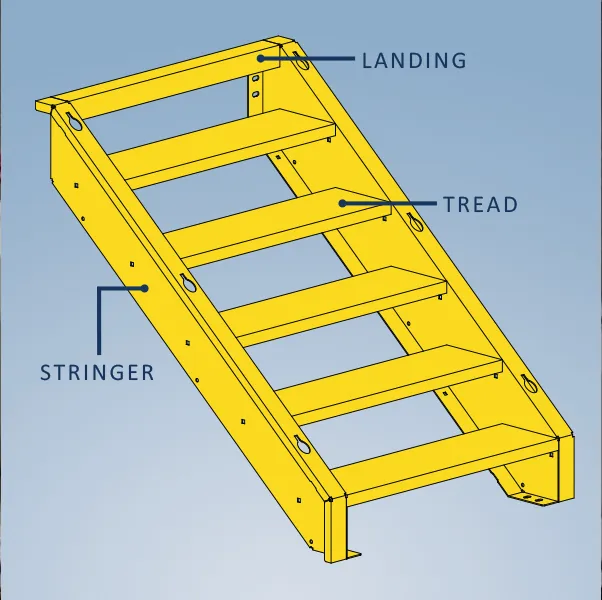
Figure 2 & 3
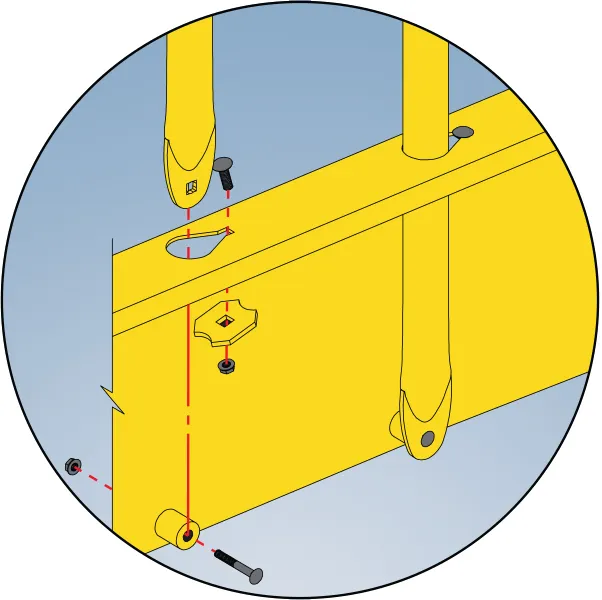
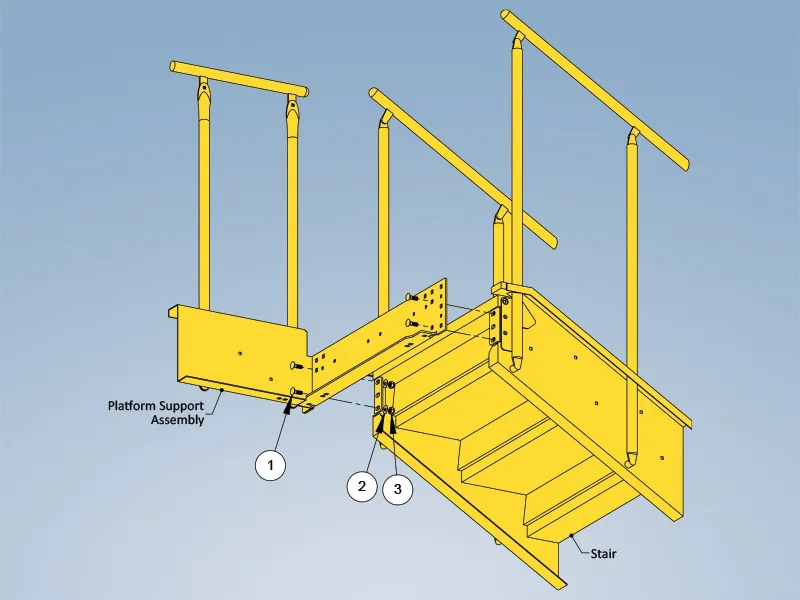
Place the stringers parallel and install the landing with one bolt on each side to hold the stringers in place. If your stair has back pans, insert the provided carriage bolts through the bottom flange of the stringer, place the back pans starting at the bottom, add the flange nuts, and hand tighten to secure.
Figure 4
Loosely attach the treads to the stringer using the provided carriage bolts and flange nuts. The carriage bolts should be positioned so that the bolt head is on the outside of the stringer. Once the treads are in place, fully tighten all hardware.
Attach The Rails To The Stairs
Figure 5
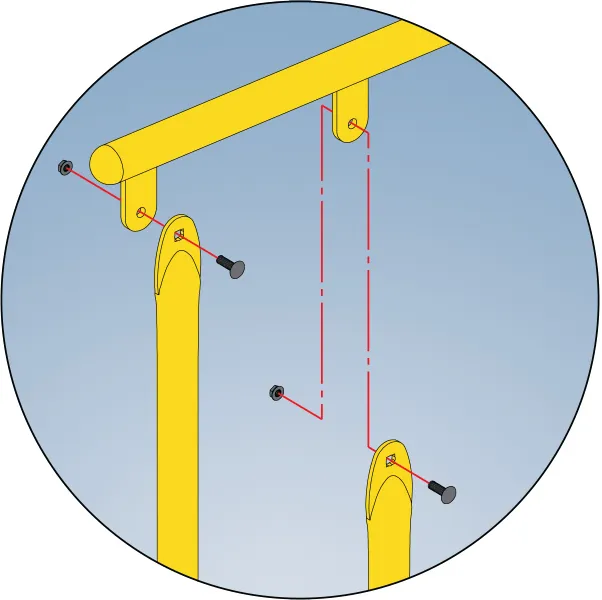
Place the provided carriage bolts in the rectangular slots at each baluster hole with the bolt head on the top of the stringer flange. Insert the balusters through the baluster holes and attach at the bottom using the provided carriage bolts, baluster spacers, and flange nuts. Install the baluster clamps on the underside of the top string flange. Ensure the clamps are oriented so that the radius of the clamp contacts the baluster. Secure with the included flange nut.
Figure 6
Attach the top rail to each baluster using the provided carriage bolts and flange nuts. The tabs on the rail go on the outside of the baluster; the bolt heads face inward towards the treads.
Figure 7
Attach the handrails to the handrail brackets using the provided carriage bolts and flange nut.
Mount The Stair
Position the top landing tread of the stair at the same elevation as the upper finished surface. Ensure the stair is straight and true to line and level.
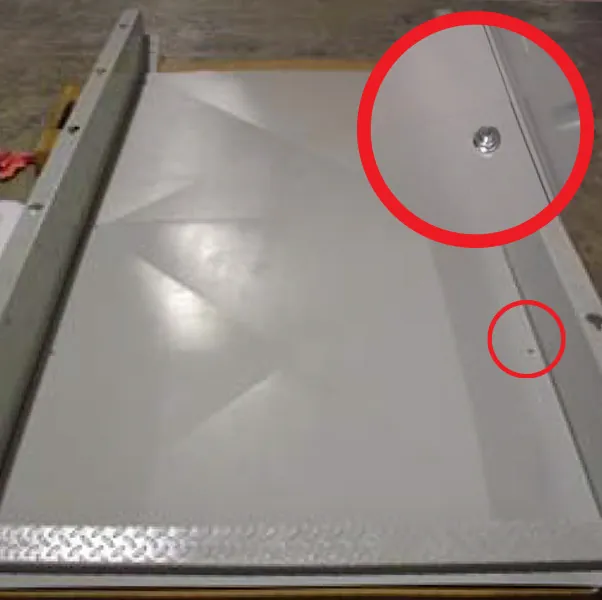
Secure the assembled stair using a minimum of two fasteners at each end of each stringer. If necessary, remove the top and/or bottom treads to access the bolts for securely tightening the stair into place. NOTE: Mounting hardware is not included.
Install bracing, if applicable, starting from the bottom of the stair on the inside of the bottom flange of the stair. The points where bracing meets will share a single mounting hole.
Reinstall the top and bottom treads, if they were removed when the stair was mounted. If necessary, use the provided touch-up paint to clean up any damages to the finish that occurred during installation.
*Tighten all bolts to a minimum torque value of 25-35 foot-pounds. Do not exceed 35 foot-pounds.
Included With Your Shipment
Bolted access stair orders ship with printed instructions that include details that are specific to the order. Use the links below to view examples of the instructions that will be included in your shipment.
To request a copy of your specific installation package, please contact a customer service representative. The links below are examples only, as individual designs and installations may vary.